Hi, this blog has been upgraded, but I'm leaving the old pages online until the search engines catch up. If you want to join the discussion, this may be the page you're looking for on the new site.
Silk Screen Printing Part 1: Making a screen
This set of articles has been in the works for a while. I finally put together the graphics so we could publish it. Nanc and I are craft ninjas, and I have always wanted to do screen printing, but I had no idea how to even start.
I knew that it was expensive (truth: not so much) and messy (truth: the mess is manageable).
You can buy a screen printing kit from an art supply store for about $60. You can make a much sturdier screen yourself for much less, leaving extra money for t-shirts and ink.
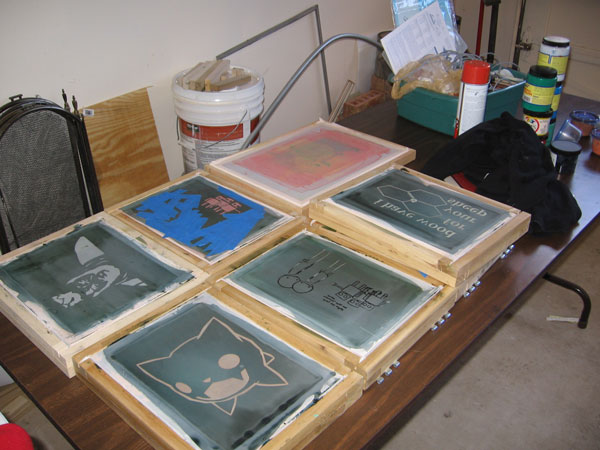
I built a bunch of screens and we had friends over for a screen printing crafturday, so I needed a cheaper way to do things than buying eight screen printing kits.
Disclaimer: I had no idea what I was doing when I built these, though I assure you that they work well. My only beef is that I wish that I had made the screens in a variety of sizes, so that I would have larger and smaller screens for specific tasks. If your are a silk screen expert and want to add your bits, feel free to add a comment.
Ingredient list
Heres what you want to buy from Home Depot or similar:
- Bag of 0.125 window spline grippy rubber tubing normally used for attaching window screens
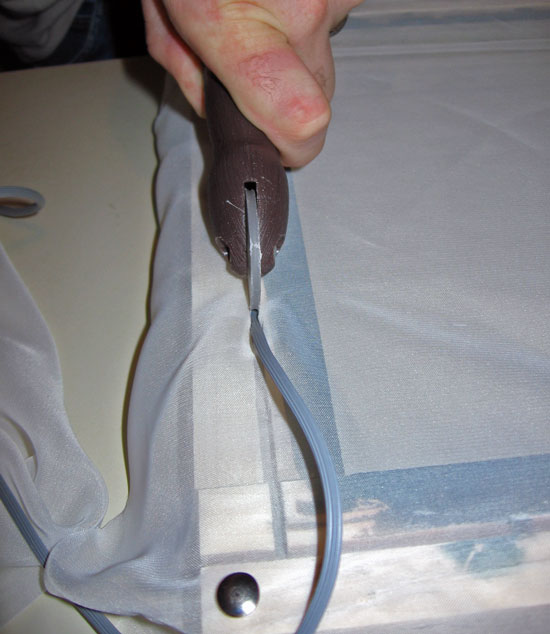
- Splining tool-looks like a pizza cutter with two wheels for putting the spline into place
- Wood ~60 of 1 x 2- If you build your screen to the specs in this article, you will need about 5 feet of 1 x 2. The type of wood is totally based on your budget, I chose Poplar.
- #8 1 Wood screws (stainless steel)
Total cost: about 15 bucks. Of course if youre making a lot of screens, a number of these items (such as the spline, splining tool and screws) will last for making many screens.
Making a bunch of screens at once also reduces your cost per screen. When I made all the screens, my cost per screen was about six dollars.
Another important ingredient is the screen itself. I was able to hit the fabric store and pick up some polyester that worked pretty well. Ive also bought screen printing fabric online from DickBlick.com which is only marginally more expensive, and is definitely preferred. I was able to get a much cleaner print from the real screen material.
Heres a list of extra stuff that I used in the construction.These materials were hanging around the house:
- Router with a 1/8 bit
- Table saw, circular saw, or some other way to precisely cut wood
- Drill (with some drill bits, and screwdriver bits)
- Sandpaper or sander
- Polyurethane
- Wood glue
- Thumbtacks
- Clamps
Construction notes
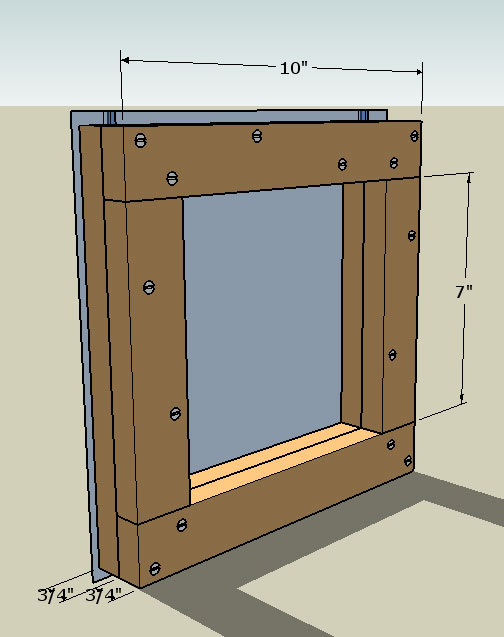
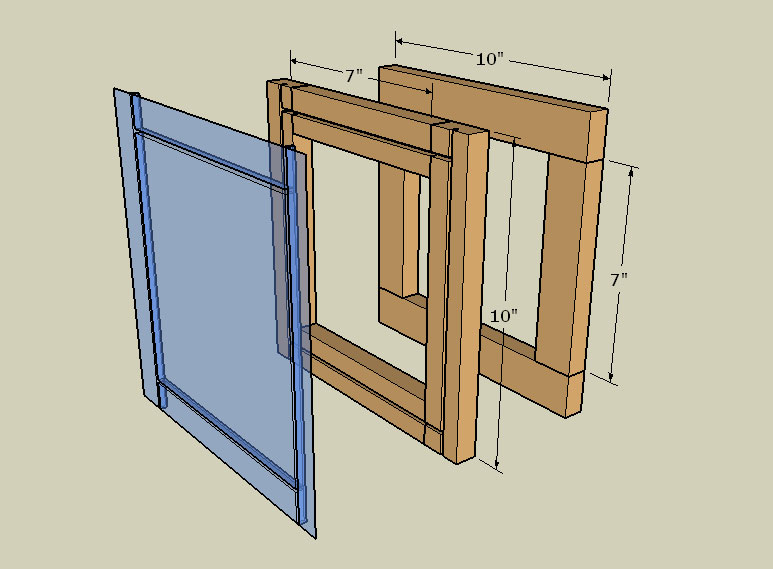
Construction is pretty simple, and you should be able to get the gist from the pictures. Here are a couple of notes that might help.
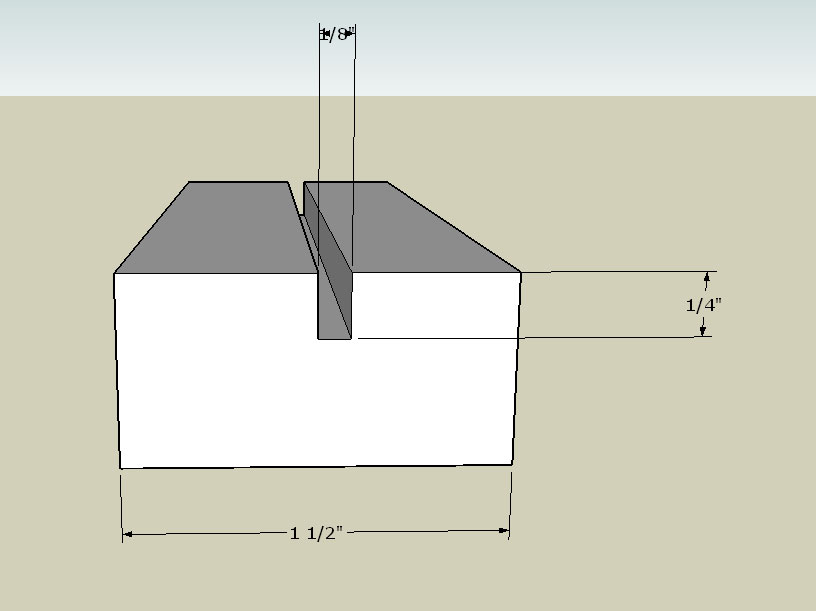
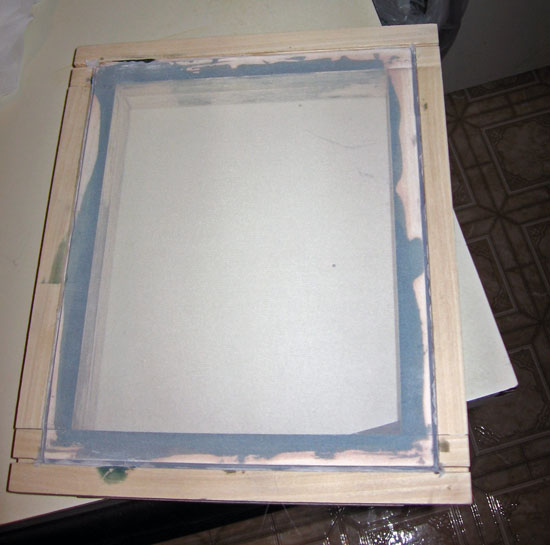
First I cut the pieces down to size. Then I routed out the 1/8 x 1/4" channel in about half of the wood using multiple passes on the router. I made sure that the channel was routed exactly in the middle of the wood. Also, remember that some of the pieces will also need some additional small segments routed so that the channel will go all around the screen.
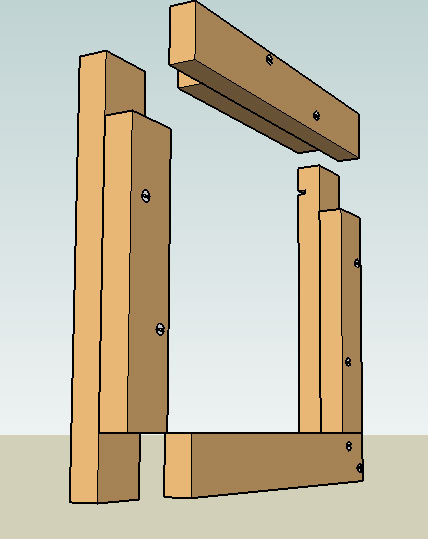
Next, construct each of the sides by gluing and clamping the pieces together, then adding the screws. Make sure to drill pilot holes first to avoid splitting the wood. Countersinking the screws will make everything easier on you later.
The amount of wood and screws used in this may seem like overkill, but you want the frame to be really solid. Stretching a screen puts the frame under a great deal of pressure, and you dont want it to warp. Hopefully, your screen will last you for several years of use.
After putting it together, take the extra time to sand it and seal it. This will ensure that your screen lasts longer and will also make it much easier to work with.
Stretching the screen
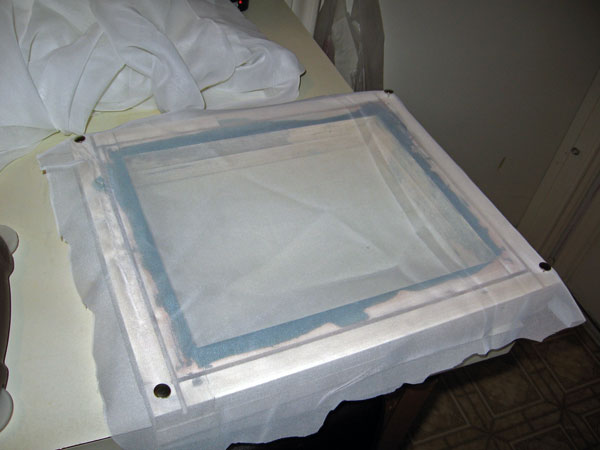
Once your screen is complete, its time to stretch the fabric. First, use thumbtacks to pin the fabric to the screen (not too tight), and cut the fabric out, allowing a couple of extra inches on each side.
Then work the spline in with the splining tool, wedging the spline and the screen into the channel that you routed out. Sometimes it helps to use a screwdriver or other blunt tool to seat the spline in the corners. Once youre done, remove any thumbtacks that are still remaining and trim the excess screen.
You are ready to print.
# # #
read comments
Hi, this blog has been upgraded, but I'm leaving the old pages online until the search engines catch up. If you want to join the discussion, this may be the page you're looking for on the new site.
OOOH thank you thank you for this. :)
What a kick-ass tutorial! Thanks! I've done several screen printing projects in the past but hadn't built my own screen before. Great idea. :)
So, what are you silkscreening these days? Gonna give Absolute Pleasure t-shirts a run for their money?
its so much easier and cheaper if you use a stapler amd stretch them by hand. first staple one side if the frame if the staples are going thru the mesh put masking tape down first on the frame. go to the opposite side and pull the mesh hard and staple. work your way up the side of the frame until you get to the end. turn the screen around towards you and repeat the process for the remaining 2 sides, this should be good enough for just about every screening application have fun!!!
Certified badassery. I called 3 different art supply stores looking for the information clearly given right here.
Hello can you help me out with the Prices of and Cost of the..Silk Screen Frame's.. you have in your store.and also the Method of Payment you do accept.Thank you ad hope to hear from you SOON.
Awaiting Respond,
Chris Wallace


Craft Ninjas!!! I love it!! So True!!!
Excellent tutorial! But if it's ok with you, I'll just count on your crafturdays...