Hi, this blog has been upgraded, but I'm leaving the old pages online until the search engines catch up. If you want to join the discussion, this may be the page you're looking for on the new site.
Nursery - first pix!
Here are some pictures and video of Evie's nursery. Nanc and I have been working on it for a while, and finally have something to show off!
Before you ask, yes it's another plog. What of it?
Here's a timelapse video that I made during the painting. This was fun to do, and I'm hoping to write a little more on time lapse photography at a later date.
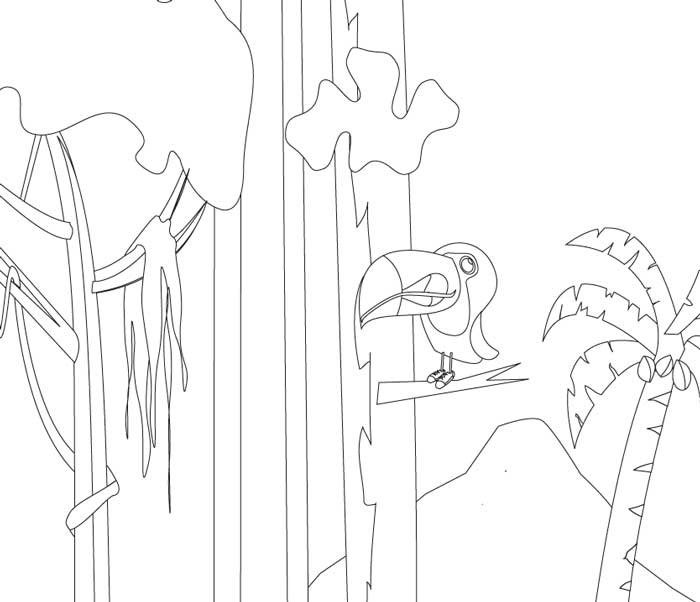
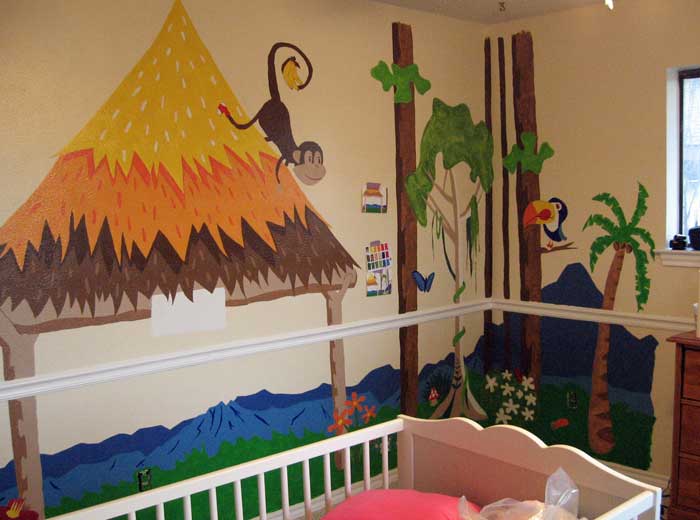
Long before Evie was born, Nanc and I had discussed painting a mural in the nursery. We're just built crafty like that. We decided on a rainforest theme, and after that, Nanc sort of let me loose, while she concerned herself with being pregnant.
I'm artsy, but I'm definitely not an artist. This is the first painting that I've done since high school. So, I promptly went out and bought a book on painting murals from Amazon. I looked through the book, but I didn't actually take that much advice from the book. I decided to make my own way through the wilderness.
Prepping the room
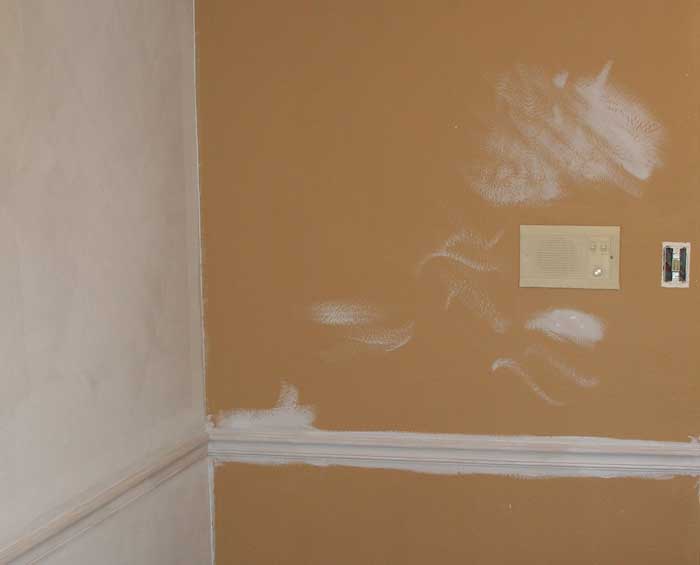
The room (previously known as the PEZ room or the Crazy room) was something to behold. I really wish that I had a picture of it before I stripped out all of the decorations. We had weird stuff on every wall, including a Brannock device, a large Elvis clock, and tin signs.
Once I got everything taken down, and got to work, I realized that the room was just a mess. There were many, many holes in the walls that needed patching. There were also some big holes from a botched cable install before we got the house, and some other unique dents and divots to spackle and patch.
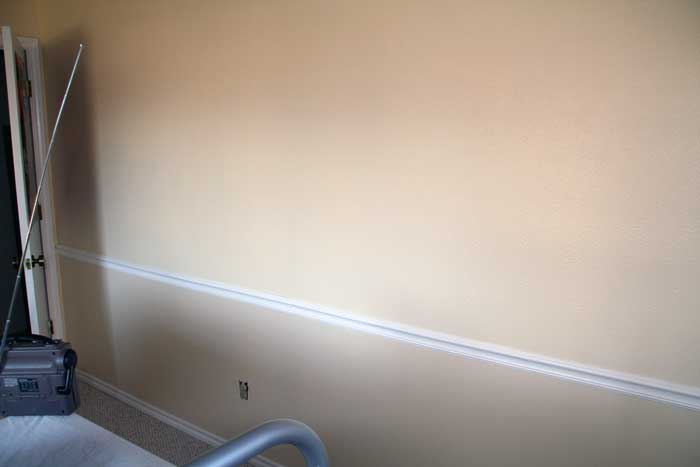
So, before I could even think about the mural, there was a coat of Killz, two coats of paint on the wall, and all of the trim to paint. I finished the basecoat and trim just as Evie was coming home from the hospital last month.
Designing
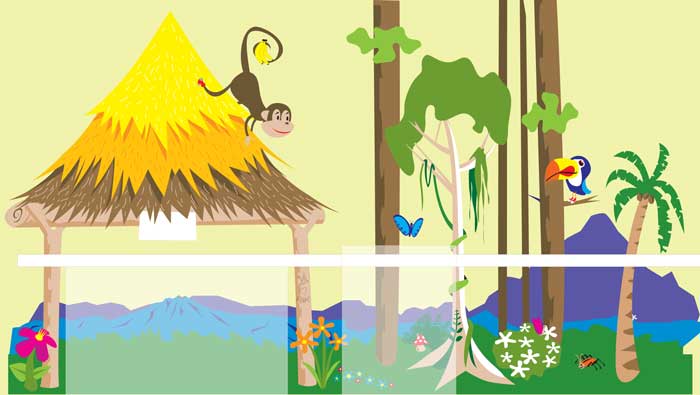
Next came the design. I knew that I wanted something bright, with simple shapes. I also wanted something that I would appreciate, otherwise I would be really sick of it before I finished.
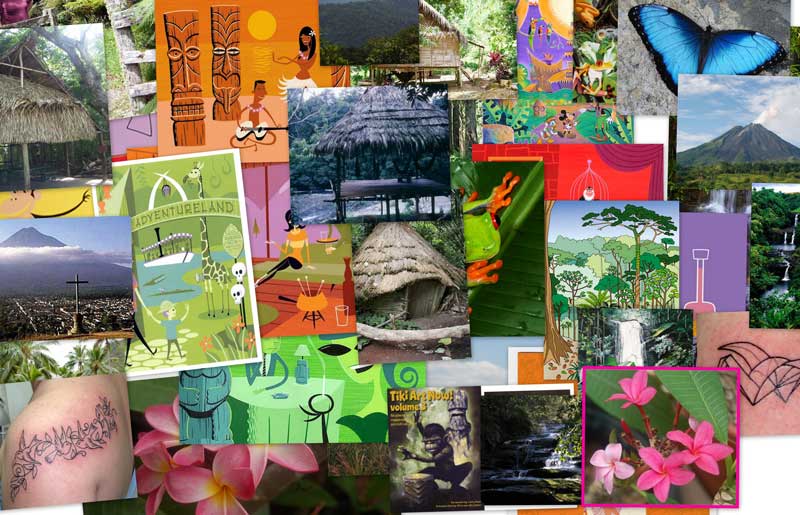
I also wanted it to be somewhat accurate, so I tried to incorporate flora and fauna that would actually populate a rainforest. For instance, a giraffe, though cute, would probably not be found in the rainforest. Sometimes, OCD can be a great burden, non?
Stylewise, I tried for a cross between Shag and Hanna-Barbera. The design is all solid colors and shapes, with little to no blending. Once I set this scope, I started to feel like I could probably pull this off.
I started collecting design inspiration from anywhere I could. I had all sorts of images and photos from the internet, and a few books that I drew from.
I did a lot of sketching on paper, then moved to the computer, mainly because I feel more comfortable working in illustration programs than on paper. You gotta work with your strengths. I created the design in Adobe Illustrator over the course of a week or two. I chose to use Illustrator, since creating a vector-based design worked well for my idea of a colorful and simple world. It also scaled up to size cleanly.
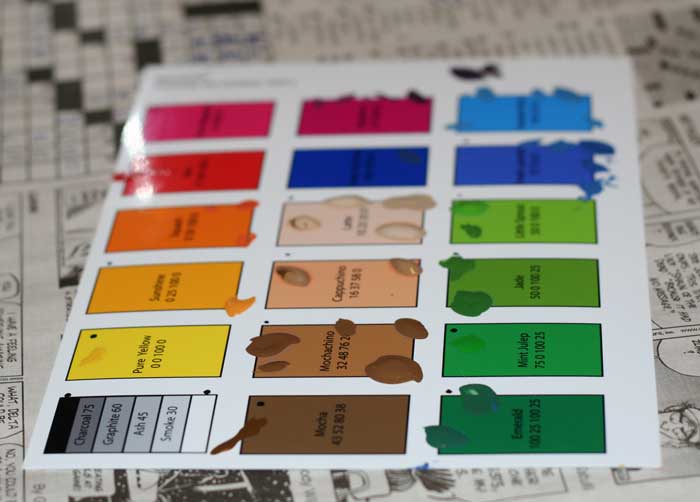
I tried to contain the color palette, but I ended up with around 20 colors, including fours shades of green and four shades of brown.
Once I thought that I was done with the design, I took a break for a few days, then did some reality checks against the room. I made some tweaks and changes, and ended up with the final version.
Transferring design
The next obstacle was how to get the design off of the computer and onto the wall. The typical way to do this is to put a grid on the wall, and then redraw the design in full scale based on the grid intersections.
That didn't sound like any fun, at all. In addition, it sounded like a lot of work. Bluck!
Instead, I cruised Craigslist, looking for a classroom overhead projector. I knew that I could print on transparency plastic, project it on the wall, and trace it. Before I purchased it, I heard that Target was clearing out some kiddie video projectors for cheap! So, I hustled down, and picked up a Torpedo projector for $50. In retrospect, I wish that I had gone with the overhead projector. The kiddie video projector is truly an abysmal product, possibly worth less than the money I spent. Oh well, maybe next time...
I also had to buy a $20 adapter so that my laptop could connect to the projector's RCA jacks.
The projector didn't put off a bright picture, so I had to do all of my work in the dead of night. The resolution was very poor, so I could only work with small chunks of about three feet square at one time. In order to avoid massive issues with keystoning and weird angles across the design, I secured the projector to a rolling stand, and rolled it across the room , and put the projector on different shelves when I needed to change the height.
While the image was projected onto the wall, I used a hard pencil to lightly trace the design onto the wall. I had a headlamp that I would occasionally turn on to check my work, since I couldn't really see the pencil marks in the dark.
But the upside is now I have a little video projector to play with. It will end up in some project, I'm sure.
Paint
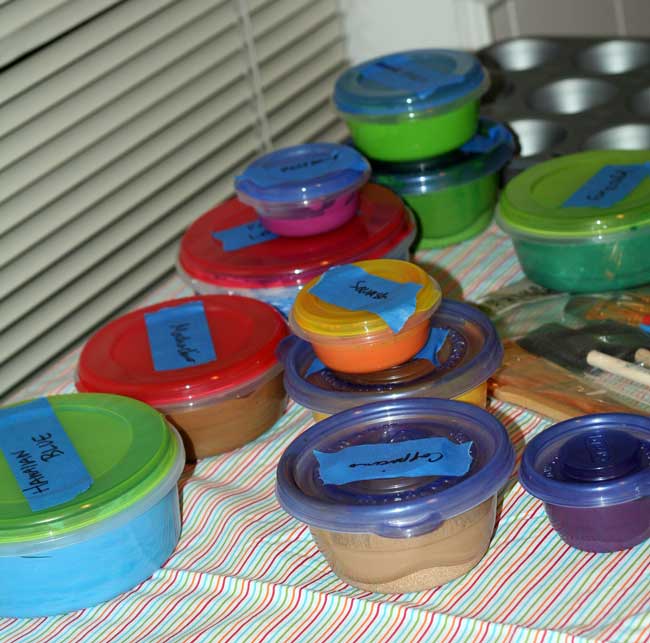
I was on a budget, and couldn't afford to buy 20 quarts of premixed paint, so I knew early on that I would be mixing my own paint. I dreaded mixing the paint colors. I have horrible memories of color wheels, and making large vats of purply-brown, when trying to make green.
Then, I had a thought. I made the design using CMYK color in Illustrator. If you're not familiar, CMYK is a color process often used in professional printing, where all of the colors can be made using a combination of Cyan, Magenta, Yellow, and BlacK. For each color in Illustrator, I had the CMYK value description for the color. For instance, a Lavender color would be made of C=75% M=75% Y=0 K=0. So, if I used CMYK paints instead of the typical RYB to mix, I would have a pretty precise description for each color.
So, that's pretty much what we did and it worked. I did buy a couple of extra colors too, just to make life a little easier. I bought a dark brown, and a vivid green, white, as well as a red.
I tried to buy most of my paint at a paint store that rhymes with Werwin Shwilliams, but there were a couple of colors that I just couldn't get (like magenta and cyan). An artsy friend from work (hi Cathie) suggested that I pick up some tubes of acrylic paint from the art store. Since acrylic and latex paints are water-based, they played very well together.
I asked Nanc to mix up the paint colors, since she has a much keener eye for it than I. So, over the course of one Friday night, she mixed up all of the paint colors, and put them in their own individual Tupperware-esque containers. She also added a little Floetrol to each, which thinned the paint a little, so that brush marks wouldn't be so obvious.
Painting it
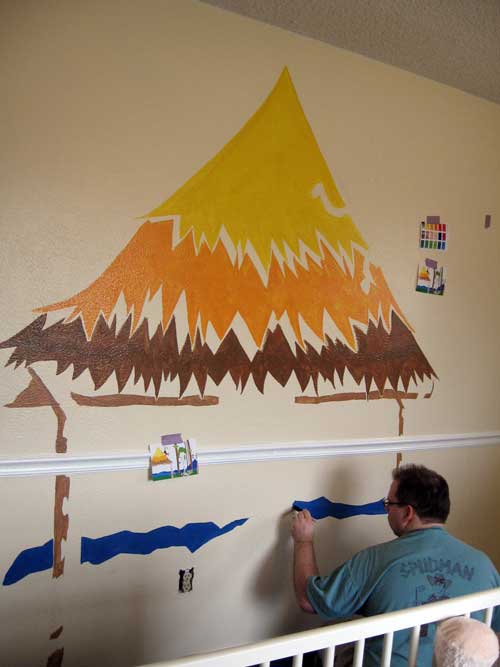
Painting took a while. I painted the mural over the course of one week. Based on the timelapse photo timestamps, I figure that we spent about 32 hours painting. Nanc pitched in when she could, but mostly she was hanging out with Evie, so that I could work on the painting.
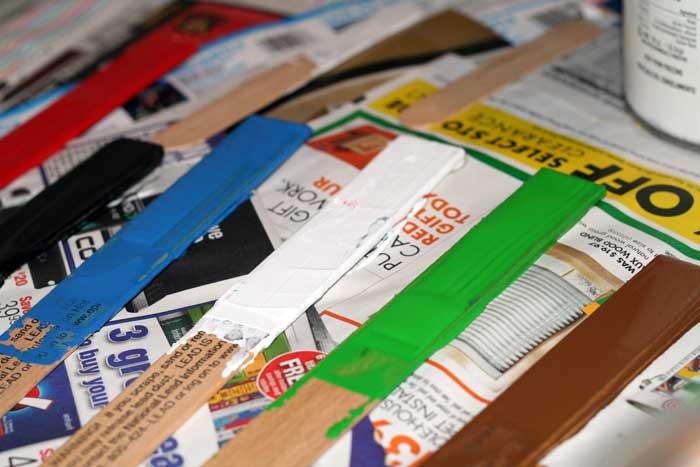
Since I had traced the design onto the wall, at this point, it was like painting a giant paint-by-numbers. I bought a package full of brushes from Michaels for the walls, but most of the brushes were not fit for this task. I painted large swaths with a sponge brush, since I wanted blocks of solid color on the wall. For large parts, I used my trusty 2 ½" cut-in brush. For small bits, I used a couple of thin detailing brushes. But the package of brushes from Michaels did end up being useful. I used all of those brushes as paint stirrers.
Pretty much everything took two coats. I liked the effect of one coat of paint on some of the trees, but everything else was two coats, to get a nice, even color.
We still have one or two small details to finish, and then I'm planning to seal the paint with a water-based poly. Then I start on the second one...
# # #
read comments
Hi, this blog has been upgraded, but I'm leaving the old pages online until the search engines catch up. If you want to join the discussion, this may be the page you're looking for on the new site.
good lord. this is awesome. i want to do time lapse videos! hahaha.
great job on the mural. you really do take it to a whole new level w/ the geekiness. I bow to you!
I have seen it in person and it is awesome
WOW!!
I don't know what else to say. That is so awesome and something she can grow with for many years. You sure are a fast painter, watching the time-lapse videos.
That is fantastic! You did a wonderful job! Congratulations!
Wow this looks amazing, great job! So cool!
Sparky sez you have too much free time on your hands. I say Evie looks absolutely beautiful now that she got past that new baby stare.Sparky sez he always sez the wrong thing, so always think the opposite, but I agree with his first statement! Love you both! Kirsti & Sparky (Yikes!)


It's a masterpiece! Evie's ma and pa are the bomb. I sent your YouTube video to my neice and her husband 'cause they're expecting, and without even trying, you've launched a competition: they now feel COMPELLED to do some sort of original mural on their still-a-bump's walls. Stay tuned.