Hi, this blog has been upgraded, but I'm leaving the old pages online until the search engines catch up. If you want to join the discussion, this may be the page you're looking for on the new site.
Silk Screen Printing Part 3: Burning the screen
Usually, this is the space where I would carefully craft a sassy teaser, to get you interested in the article, and to compell you to click on the link.
I'm much too tired, so... It's a multi-part article. I've got you trapped. Click on the link, or else you won't have the full set.
In Part 3 of this series, we discuss preparing your screen for printing.
Need a quick link to Part 1, so you can build the screen? Here you go. Need a quick link to Part 2, to refresh on creating your design? Here you go.
Youve got the screen, but do you know how to use it? Sure, you could ink up your screen right now and make prints, but all you would end up with are ink rectangles the size of your screen. Though unique, this is hardly impressive or witty.
Instead, you want to modify the screen in such a way that you control how the ink flows. You do that by blocking off some of the holes in the screen. Where the screen is blocked, the ink wont flow, creating the design.
There are a couple of methods that you can use to block off the screen. My personal favorite is to use photo emulsion. Using this method, you create a photo-sensitive layer on your screen that can be used to create very detailed graphics. By laying the design positive created in Part 2 on top of the screen and exposing it to bright light, you burn your design on to the screen.
Heres what youre going to need to gather get your screen prepped:
- The screen you built
- Photo emulsion diazo stuff which you can find at well-stocked craft stores or online. This costs about $25 for 7 ounces, and can be used to create a boatload of screens. Seriously, 7 ounces goes a long way.
- Something to skim the emulsion onto the screen. I prefer the flimsy fake credit card that I get all the time in the mail
- Rubber gloves (These are optional, and I prefer the disposable ones)
- A darkish room (a bathroom with no windows works great)
- A bright lamp with a reflector. I bought a cheap metal reflector with a grippy, springy holder and a clear 150W light bulb at Home Depot for under $10 and it works pretty well.
- Red light bulb (this is optional for your dark room work)
- 3M Super 77 spray adhesive (again optional, but makes life kinda nice)
- old newspapers (optional, but keeps your work spaces tidy)
- fan (optional for speeding the screen drying process)
- wood blocks (optional for the screen drying process)
Go ahead and gather the requisite items, Ill wait here.
Making your screen photo-sensitive
Mix the Diazo as it tells you in the directions. Once you have it mixed, it has a short shelf life. Keeping it in the fridge will make it last a little longer - around 3-4 months, plus its fun to keep non-food items in the fridge.
Take the screen, the Diazo, the fake credit card, and rubber gloves into your darkish room. Using rubber gloves will help you avoid the social faux pas of having green photo emulsion under your nails for a couple of days.
Drizzle the Diazo goop onto the screen and Use the fake credit card to scoop, skim, and spread a thin coat. Try to get the excess back into the bottle.
Scrape the excess goop, flip the screen, and scrape from the other side. Repeat until you arent getting any more excess off. You are hoping to get a nice thin, even coat. Drippy blobs are whammies. Avoid them, since they can screw up your artistic design. Also, it may be obvious, but don't let the wet screen touch anything.
I hear you complaining How can I see what Im doing in this dark room? Well you can have a little bit of indirect light, just not too much. Visitors to our house may wonder why we have a red lamp in our guest bathroom. Now you know. Red light doesnt have any negative effects on the photo emulsion. Plus, the red light makes you feel like you are doing top secret photo developing stuff.
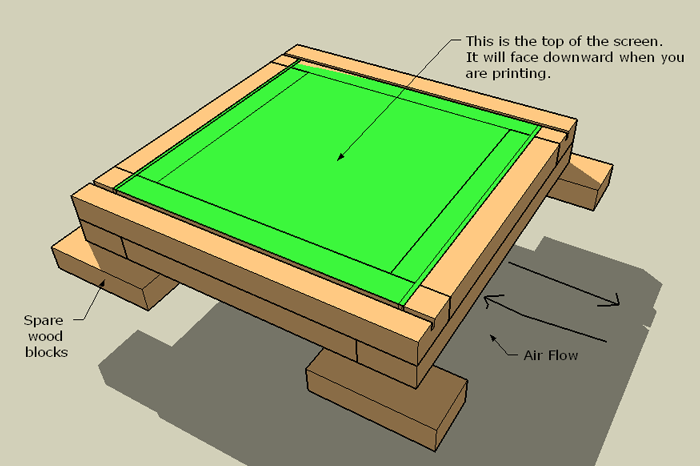
Then set the screen to dry. It doesnt hurt to lay newspapers down to catch any spare drips and blobs that may occur. You will want the screen to dry facing up, so that the area of the screen that will eventually touch the shirt, bag, paper, or whatever dries nice and flat.
To speed up the drying process, you can do a couple of things. First, set the screen up on blocks, like that classic 1981 LeCar thats up on blocks in your front yard. This will increase the air flow.
You can also use a fan to increase the airflow and cut the drying time down to about an hour. I tried to make a comparison of this step to a Chevette here, but I couldnt pull it off.
Once its dry, store the prepped screen in the dark until youre ready to use it. I put my screens in a cardboard box lined with a towel.
burning your design on to the screen
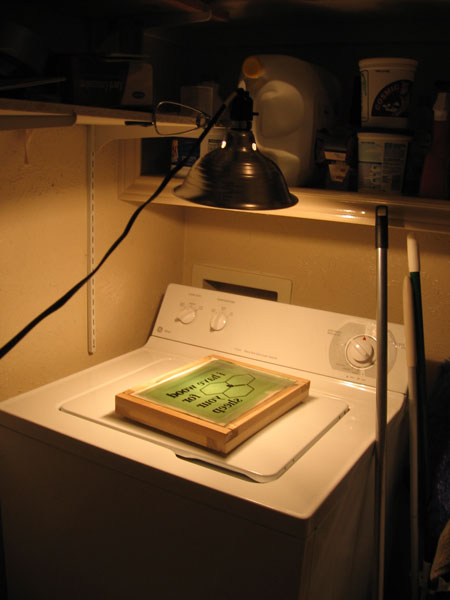
There are two ways to expose the screen: using the sun or a lamp. I prefer the lamp, since I can control the brightness, and I know how long it will take to expose.
A couple of items about the lamp. Use a reflector and a bright bulb. Try to get the light directly over the screen, so that the light distributes evenly. Also make sure that the light and the screen won't move while you are burning the screen, otherwise it could muff the process.
In a darkish room, grab your photo-emulsed screen, and lay it face up. Spray a quick dab of Super 77 spray adhesive on the top of the screen and let it sit for about five minutes till the adhesive feels like little rubbery bumps (but not sticky). The spray adhesive will hold the transparency in place, without slipping.
Examine your transparency, and ensure that there arent any extra blotches of ink, hairs, or anything else that might muss it up.
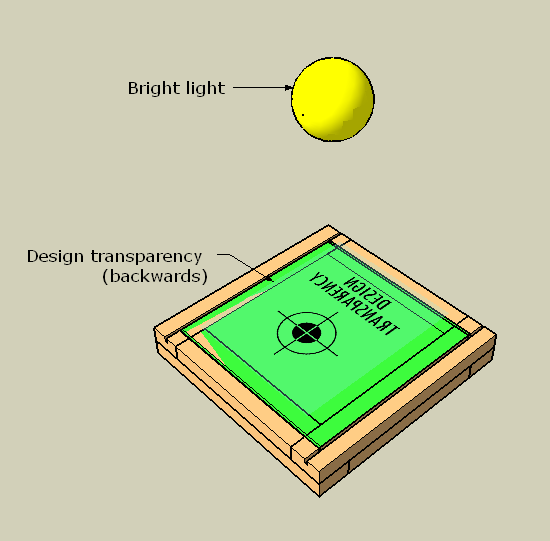
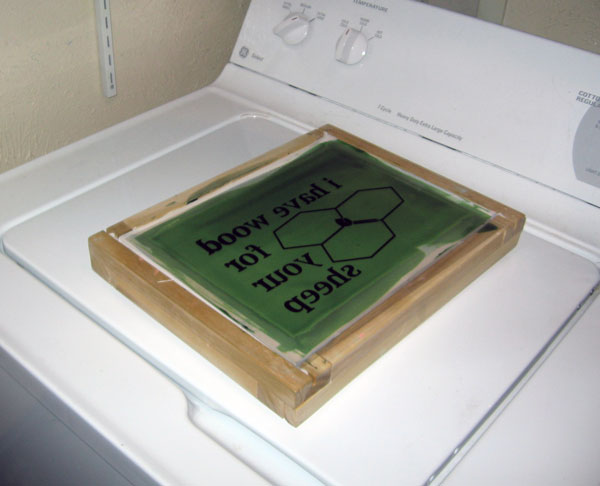
Then carefully place your transparency on the top of the screen backwards. When you flip the screen over for printing your design will be facing the correct way. Ensure that you have a good margin all the way around, then press the transparency on.
For good measure, I also put a plate of glass (from a picture frame) on top of the transparency.
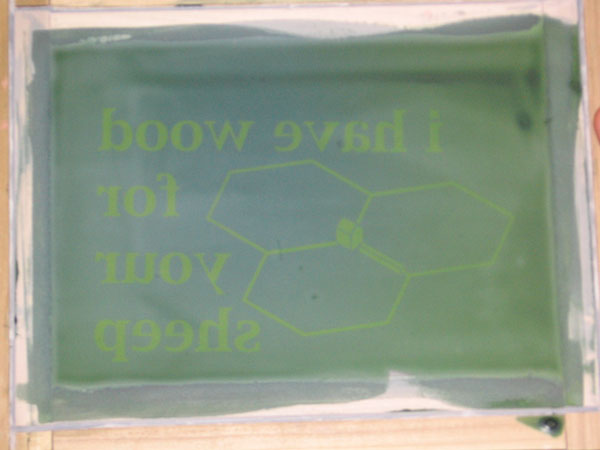
Place the screen under the lamp, and fire it up! At the pre-determined time, turn off the light and take the transparency off. Where the black ink covered the screen, you should notice that the emulsion is slightly lighter in color.
Timing will be different based on your setup, and it may take a couple of times for you to get the timings down. In my setup, it takes between 45 minutes and an hour for me to burn a screen in my laundry room photo lab.
If you dont let the screen burn long enough, all of the emulsion will rinse out. If you burn the screen too long, it will be impossible to rinse out cleanly and the edges of your design will burn over.
rinsing the screen
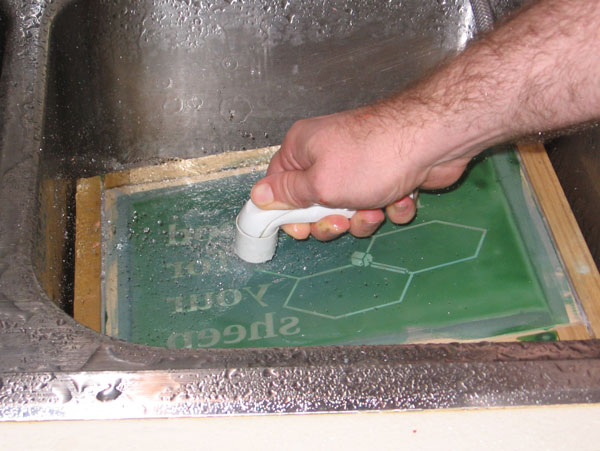
Rinse the screen in cool-ish water (think room temperature). The sprayer attachment on a sink is a godsend for this. It will take a minute or two before the emulsion starts to rinse off, but keep spraying. Flip the screen over, and rinse the screen from the other side too. Soon, the lighter colored emulsion will start to rinse away, leaving a clean screen.
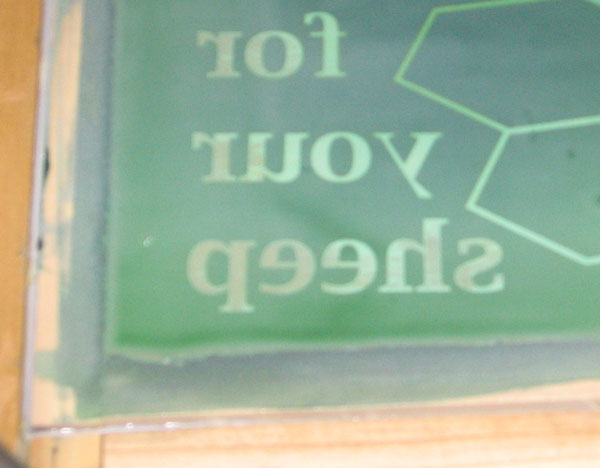
When you think that all of the emulsion is out, hold the screen up to the light and carefully examine it to ensure that all of the screen holes are cleared. Be careful not to under or over rinse your screen.
Once youve rinsed your screen, let it dry. Completely. Take a break, you've done some great work.
Get ready for Part 4, where we actually get around to printing!
# # #
read comments
Hi, this blog has been upgraded, but I'm leaving the old pages online until the search engines catch up. If you want to join the discussion, this may be the page you're looking for on the new site.
Partial or not, you're right, Matty rocks!
Hey! I love this design, I hope you're making shirts to sell and not just using it for a tutorial. I want one. Or several.
(although around our Settlers table, it's usually me saying "anybody got brick? my firstborn for brick?" and Phil sitting back with that smug "I'm gonna win" expression. Argh).
your totally funnny....its official all the way from italy
"In a darkish room, grab your photo-emulsed screen, and lay it face up. Spray a quick dab of Super 77 spray adhesive on the top of the screen"
are you POSITIVE you don't mean face down??? it just doesn't look right in my head because you have to flip it later...
Yesss. Exactly the info I was looking for!! Great peice of writing!!
Thank you-
how long do u expose it if its in the sun?
how long do u expose it if its in the sun?
i wonder if you mess up on your screen or you want to use it again can you just burn the emultion off? or you have to buy a new silk screen?
I was wondering how long you had to take an image off of a silk screen before it became dificult or impossible to do so?
great information, thanks!
i too would like to know about the range of exposure time in the sun. i live where the sun shines bright and hot. suggestions?


"scoop, skim, and spread"
"muff the process"
I can't wait to see what kind of hits we'll get for this. Hee hee.
Great information, Matt. You rock! (Although I may be partial.)